|
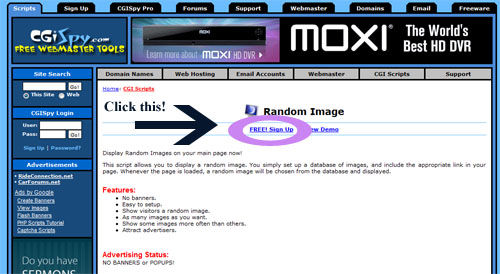
Step 2: Click on the link in the middle of the page that says: FREE! Sign Up
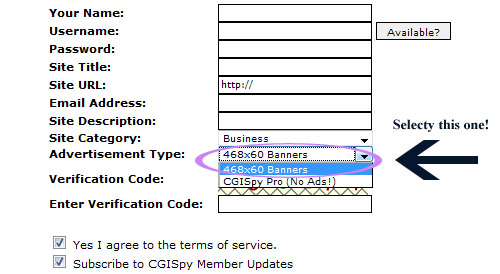
Step 3: Fill out the form and make sure to select 468x60
Banners so that you can still get it for free!
Step 4: Check your e-mail to validate
your account!
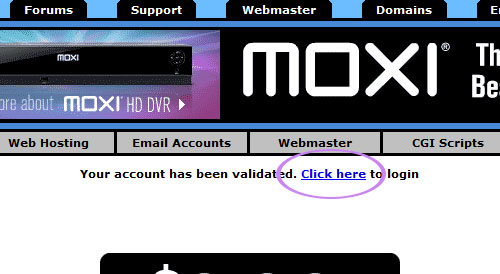
Step 5: Once you’ve validated your account, click the “Click
here” link to log in and log in!
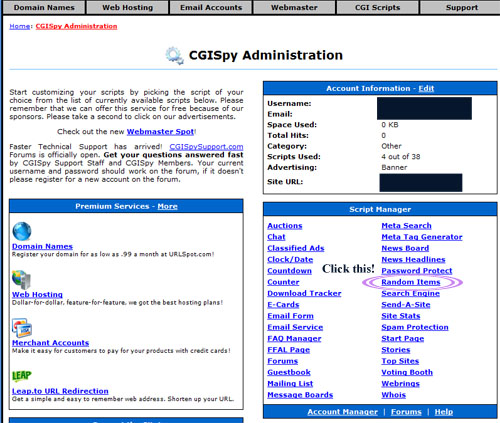
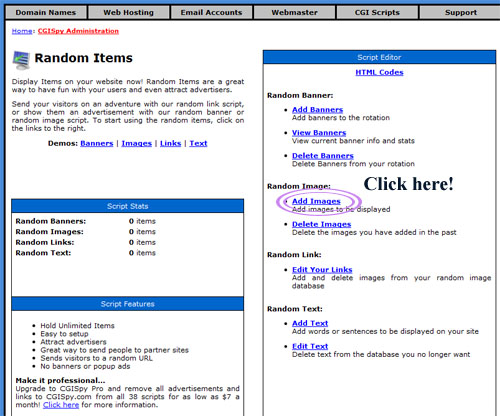
Step 6: Once logged in, look under the section titled, Script
Manager to locate the link, Random Items. Click on Random
Items!
Step 7: Then under Script Editor locate the Random Image section and click on the Add Image link under it.
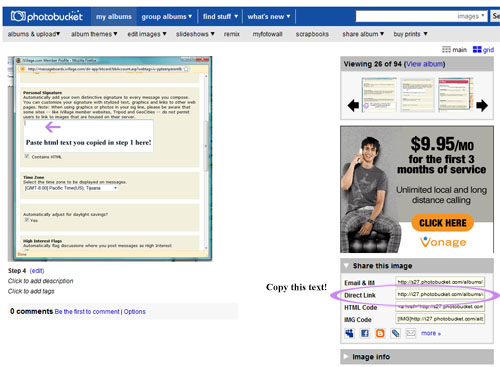
Step 8: Then copy and paste all your URL links for the sigs you want in your rotator
from your photo storage account, such as Photobucket.
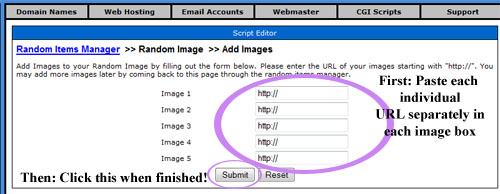
Step 9: Paste each individual URL that you’d like in your rotator separately into each of the image boxes below. Make sure you don’t accidentally have
the http:// part in there twice before
clicking submit. When you’re
happy with the images you’ve selected click the submit button.
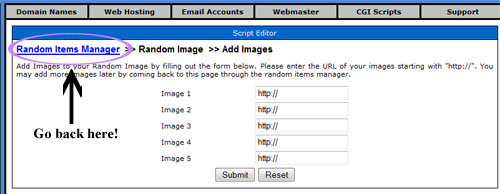
Step 10: Go back to Random
Items Manager and under Scrip Editor click HTML Codes.
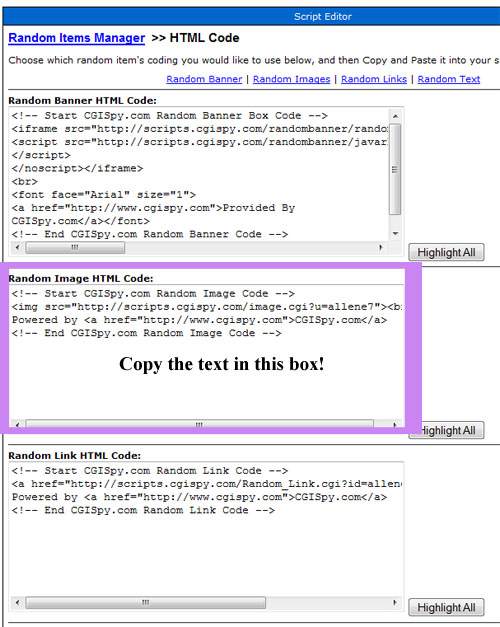
Step 11: Scroll down the page a little bit until you locate the box called Random Image HTML Code. Copy the code in that box.
Step 11: (Please refer to the Attaching a sig to your posts section for a more detailed explanation on the following
information)
Now with that code copied go to iVillage and
click on Board Settings. Scroll down
to the box called Personal Signature
and paste the code into that box. Directly under that box is a small box called, Contains HTML. Make sure you click that box. Once you’ve done all of that scroll
down to the end of the Board Settings pop up window and click submit.
There you go! You can now close that board settings pop up window. If you still don't see your ticker at the end of your new posts (any post you make after having completed
all the above steps) you may need to reload the teen mom’s board web page. If that still doesn't work then completely
close your web browser. Then reopen it and come back to this website. If none of that other stuff worked then this should
do it and you should now have your tickers at the end of each of your posts.
|

